
Your first project
A project in Splitkick is a folder on your disk. When the folder is a git repository, work happens in worktrees, one per task, and each worktree holds any number of sessions. A folder without git becomes a plain project. A plain project has one session, which runs in the folder. Its git features are off. See Plain projects.
1. Add a project
Click Add project in the sidebar and pick a folder. Splitkick does not copy or move it. You can also clone a repository or initialise a new one from the same menu.
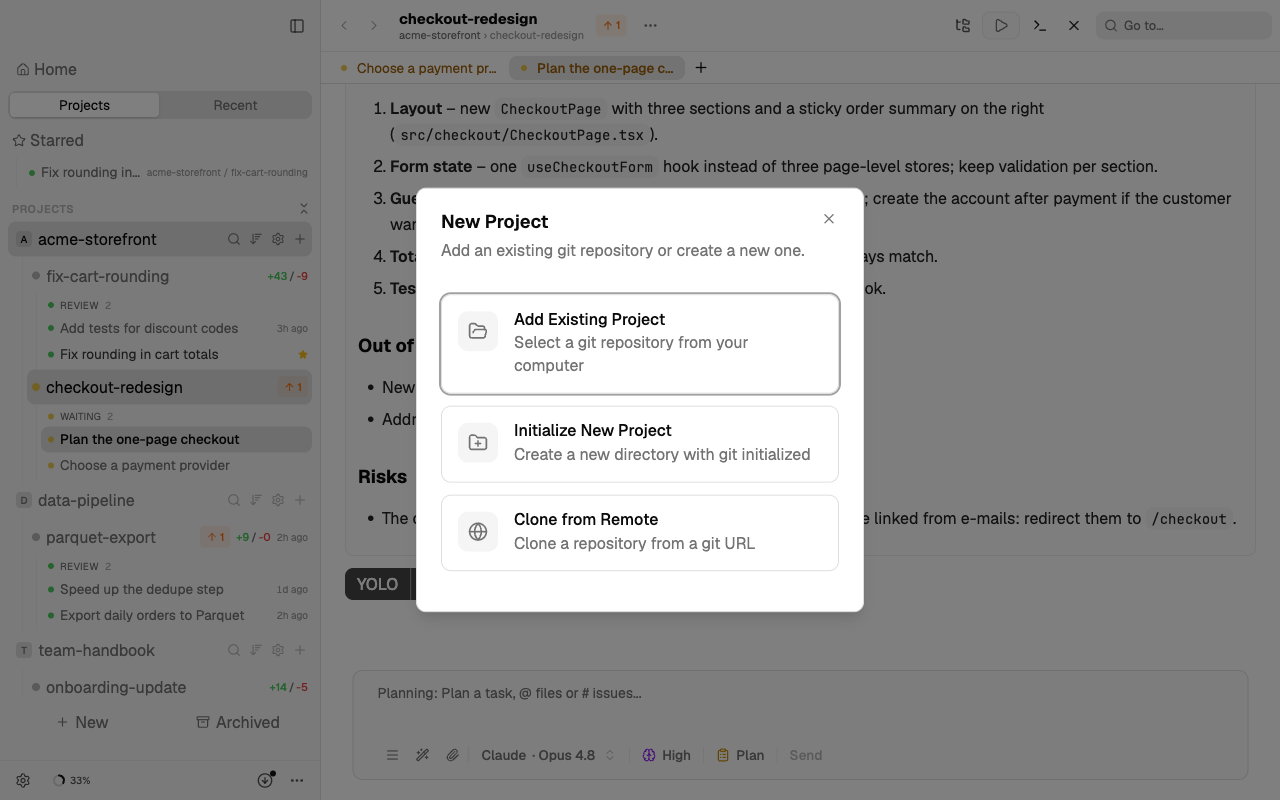
When the folder has no git, Splitkick asks what to do: Add without git makes a plain project, Initialize Git makes the folder a git repository. The steps below are for a git project.
2. Create a worktree
Open the project and create a worktree. Splitkick makes a new git worktree with its own branch under the worktrees folder (default ~/splitkick/<project name>/, changeable per project). Your main checkout stays untouched.
3. Start a session
Inside the worktree, start a session: pick the agent, the model and the mode (Plan, Build or Yolo — see Agents and modes), then type what you want. The agent works in the worktree folder, so every file change lands on that branch.
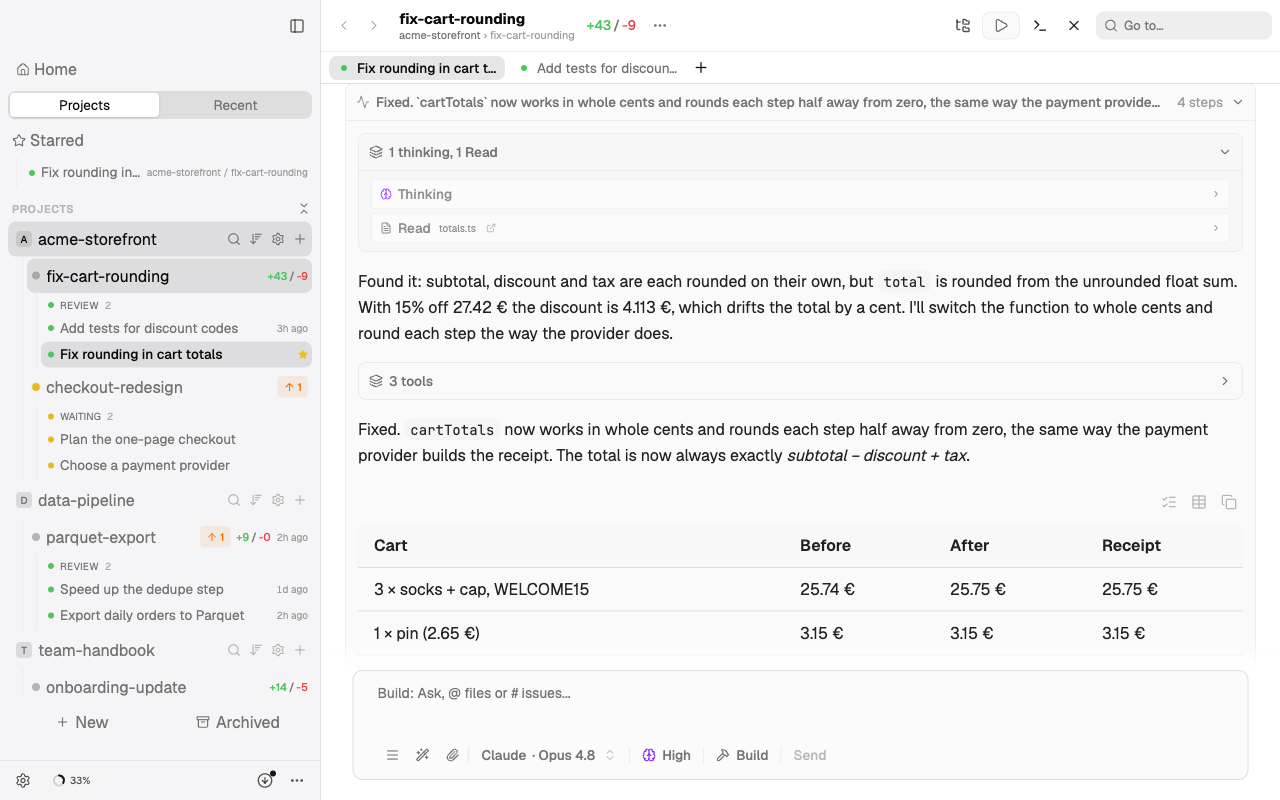
4. Review the result
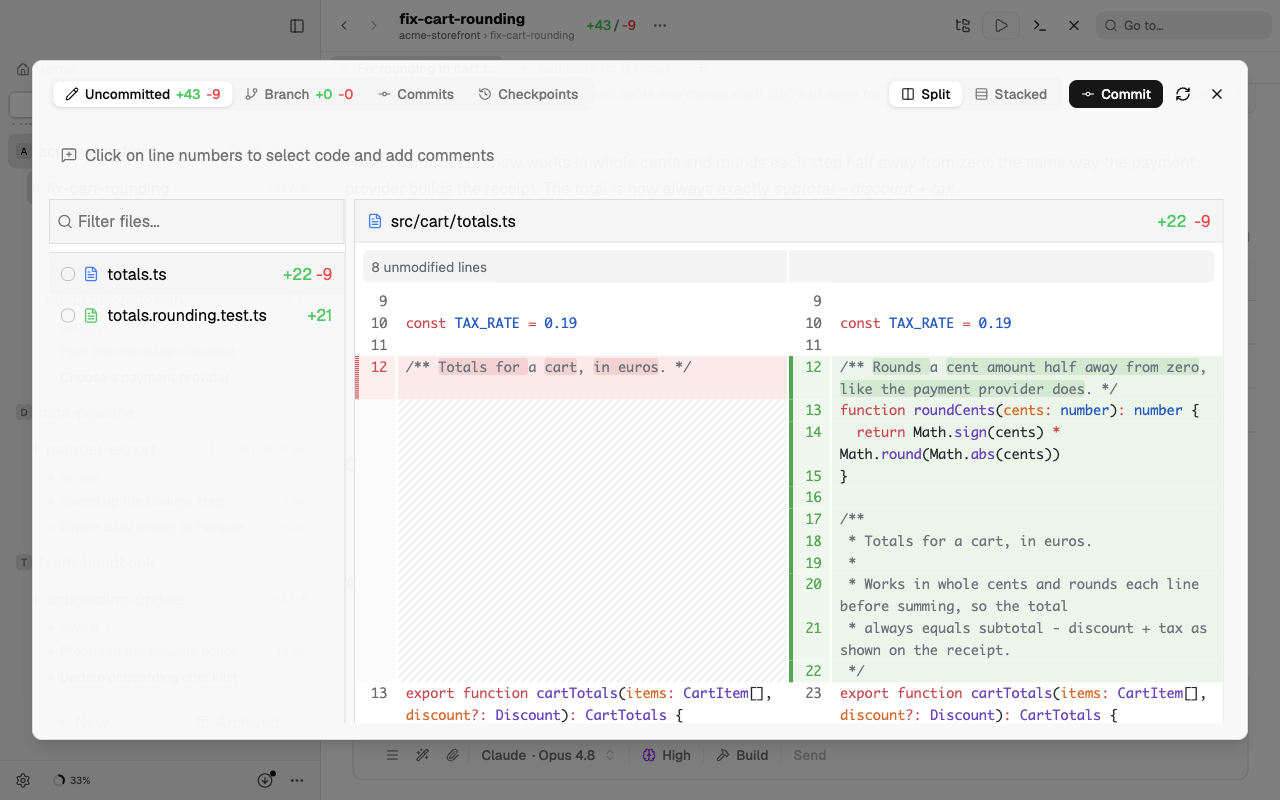
Open the diff for the worktree, read the changes, and let an agent review them if you like. Then commit, open a pull request or merge; or archive the worktree and throw it all away. See Review, commit, merge.
Next
Agents and modes explains the three modes and how plan approval works.